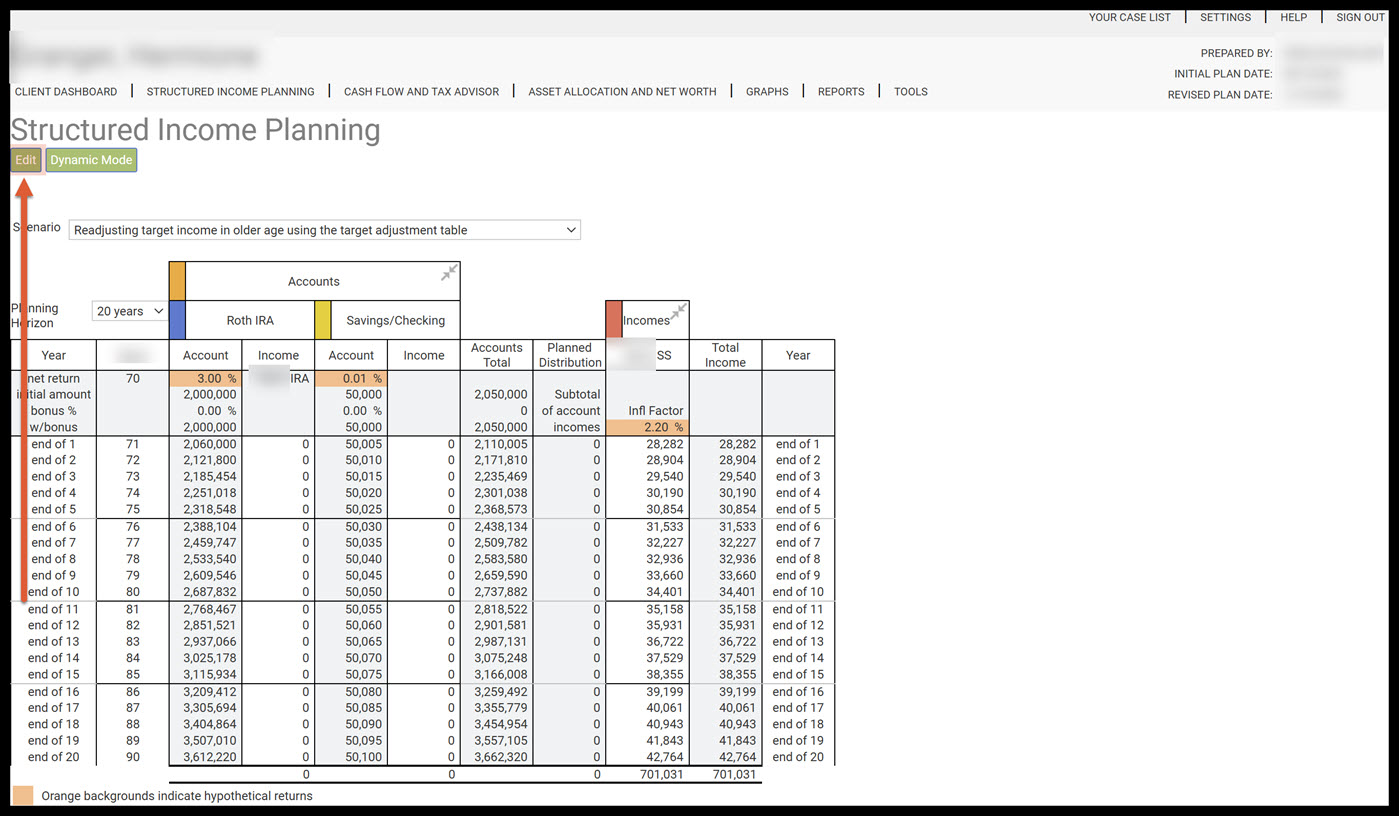
Step 1: Edit: Click on the green Edit button underneath the Structured Income Planning sub-heading.

Step 2: Add Target: Click on the green Add Target button underneath the Structured Income Planning sub heading.
Step 3: Target Name: Enter in Target Name. 
Step 4: First Year Target Income: Enter in the numeric value for the first year. SIPS recognizes the dollar mark and commas. 
Step 5: Inflation rate: Enter in the percentage amount. 
Step 6: Target Description: Enter in a description. 
Step 7: Save: Click on the green Save button underneath the Manage Target subheading.
Step 8: Structured Income Plan: Two new columns have appeared in the structured income plan: the target income and the income gap.
Step 9: Income Gap: If the numbers are in green the total amount exceed the target income. If the numbers are in red the total numbers are below the target income.
Step 10: Manage: Click on the green Manage button within the Retirement Income column.
Step 11: Add Adjustment Text Box: Type in numeric number for the Target Income Adjustment. SIPS recognizes the dollar mark and commas.
Step 12: Year: Click on the year text box you would like the Target Income Adjustment to start.
Step 13: Pick Years: Click on the green Pick Years button.
Step 14: Clicking: After clicking on the Pick year(s)button, the number that was entered into the Add Adjustment Text Box should automatically appear in the Target Adjustment column.
Step 15: Repeat: Repeat steps 11 through 14 if you would like to add another Target adjustment.
Step 16: Save: Click on the green Save button underneath the Manage Target subheading.
Step 17: Structured Income Plan: The Retirement Income column should reflect the target adjustment numbers.
Step 18: Manage: Click on the green Manage button within the accounts column.
Step 19: Calculate Plan Withdrawals: Click on the radio button for Make-up income gap based on target income.
Step 20: Income Data: Within the Income data table click on the Year text box that you would like to start the year for the rest of the plan.
Step 21: Start Years for Rest of Plan: Click on the green button Start Years for Rest of Plan.
Step 22: Clicking: After clicking on the Start Years for Rest of Plan button, the term "makeup" should automatically appear in the income column.
Step 23: Save: Click on the green button Save underneath the Manage Account subheading.
Step 24: Structured Income Planning Page: The Structured Income Planning should reflect the editing changes made to the account.
Step 25: Income Gap: If the column is clear and the numeric number is 0 this mean that the money withdrawn is equal to the target income.
Step 26: Saving the Structured Income Planning Scenario: Click the green Save button underneath the Structured Income Planning subheading.
Step 27: Edit: If you need to make an edit to the structured income plan click on the green edit button underneath the Structured Income Planning subheading.
Step 28: Cancel: If you need to go back to the previous page, click on the green Cancel button underneath the Structured Income Planning subheading.
Step 29: Logout: To sign out of SIPS, click on the Sign Out heading that is located in the upper right-hand side of the screen. If you feel you need more support or would like to set up demo time with one of our representatives, please contact us at: support@planscout.com