The Goals and Objectives section in SIPS allows you to enter a client’s financial goals and primary concerns. Information entered here is automatically included in the Goals section of all generated reports. Below is the hypothetical client we will use as an example.
Client Information:
- John Doe, age 58; birth date: 01/01/1968; retirement age: 67
- Jane Doe, age 54; birth date: 01/01/1972; retirement age: 67
Incomes:
- John Doe — Wages: $125,000 growing at 2.8% per year; Social Security (SS) at 67: $32,626 COLA at 2.8%; Pension at 67: $48,000 COLA at 2.0%
- Jane Doe — Wages: $250,000 growing at 2.8% per year; Social Security (SS) at 67: $36,000 COLA at 2.8%
Assets:
- Taxable Joint Brokerage Account (BA): $2,000,000; Moderate, 3% net growth per year
- Tax-Deferred Individual IRA (John): $450,000; Conservative, 2% net growth per year
- Tax-Free Roth (Jane): $750,000; Conservative, 2% net growth per year
- Residential home: $750,000
- RV: $175,000 in value, fully owned
Goals and Objectives:
- Both clients would like to retire at their full retirement age (67).
- Target Income: The first year will start at $250,000 with an inflation factor of 2.5%. When in retirement, the target income will continue to grow at 2.5%.
- Tax-Deferred Individual IRA (John): Contribute the full amount until the age of 67 and starting in retirement years withdrawal amounts to reach the target income for the remainder of the plan.
- Tax Free Roth (Jane): Contribute the full amount until the age of 67 and starting in retirement years withdrawal amounts to reach the target income for the remainder of the plan.
- Taxable Joint Brokerage Account (BA): Contribute the yearly excess amount from the target income until the age 67 and when retirement starts withdrawing to meet the target income. When there are excess amounts in retirement years, reinvest it back into the Brokerage Account.
Expenses:
- Gifting to Children: While working $12,000 per year, in retirement $24,000 for the remainder of their lifespan.
- Travel: While working $8,000 with an inflation factor of 2.8%, at 67 starts at $16,000 with an inflation factor of 2.8% until age 80.
Concerns:
- They would like to have enough money saved up in retirement to cover their basic needs.
- They would like to continue contributing to their children throughout their lifespan.
- They would like to travel regularly until age 80.
To learn more see articles:
Step 1: Goals and Objectives: Click on the Goals and Objectives subheading. 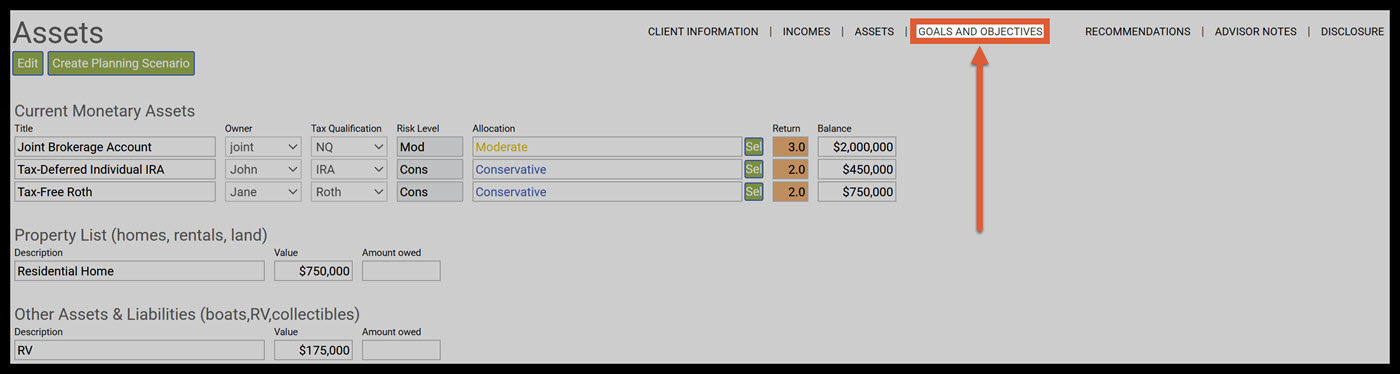
Step 2: Edit: Click on the green Edit button underneath the Goals and Concerns for Clients Name heading. 
Step 3: Add Goal: Click on the green Add Goal button underneath the Goals and Concern heading. 
Step 4: Clients Goals and Objectives Textbox: Enter the client's goals and objectives within the textbox. 
Step 5: Add Concern: Click on the green Add Concern button underneath the Goals and Concern heading. 
Step 6: Clients Biggest Concern Textbox: Enter the client’s biggest concern within the textbox. 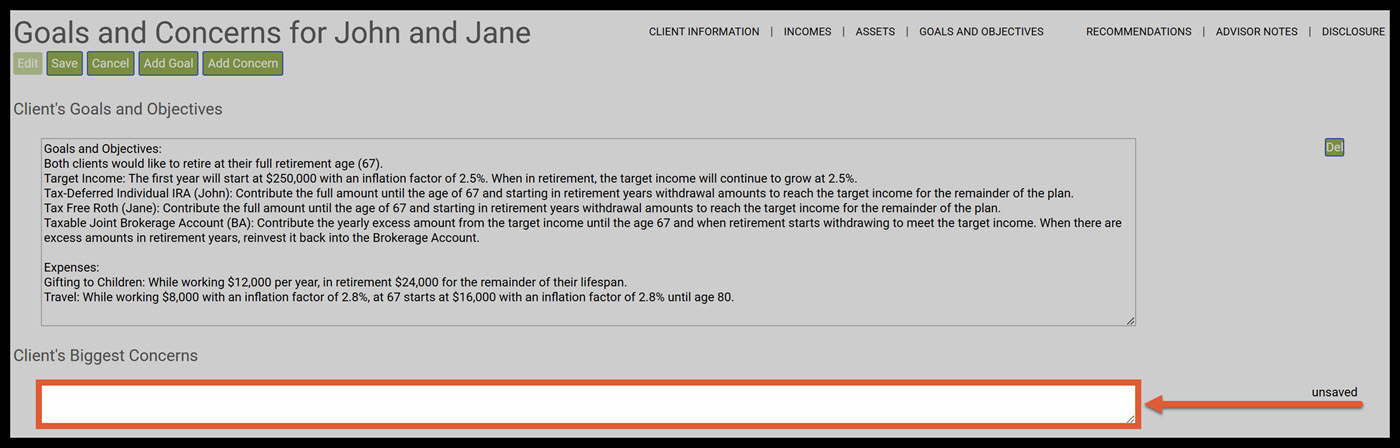
Step 7: Save: Click on the green Save button underneath the Goals and Concern heading. 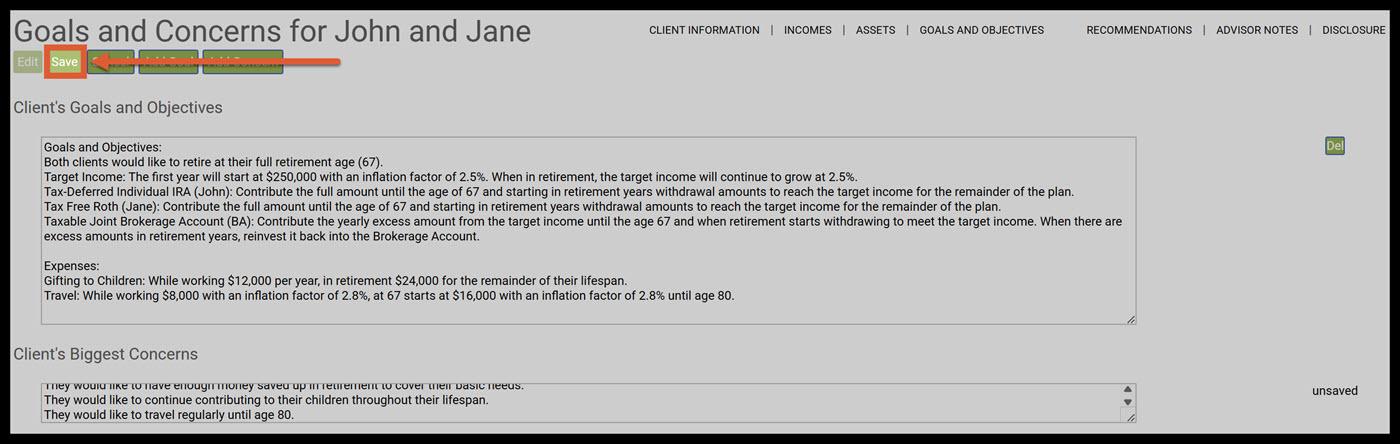
Step 8: Report View: SIPS will automatically display the text for Client's Goals and Objectives and Client's Biggest Concerns the way it will be presented in the report. If you feel you need more support or would like to set up demo time with one of our representatives, please contact us at: support@planscout.com.
